After winter break, I always find myself in the mood to start Valentines-y/Warm-Fuzzy/Lovey-Dovey projects with the kids. When doing a little searching on my blog last night, I discovered that I've done 15 Valentine's-themed lessons over the years. I had no idea I'd done so many! I thought I'd share them with you today. May of the links back to the original post will include an instructional video. Please let me know if you do any of these lessons, I'd love to see what you and your kiddos create!
Robert Indiana Love Prints! Believe it or not, my sweet FIRST GRADERS created these a couple years ago! It was a great lesson for printmaking and definitely one I will be doing again. If you don't have printing ink, you might want to check out this blog post where I'll show you how to print with paper and markers!
James Rizzi Love Birds! Who doesn't love James Rizzi?! These birds are based on some of his work and is a great tie-in if you've already taught Rizzi and his fun cityscape works.
Recycled Hearts! Last year, I had a stock pile of messy-mats from our months of painting. We used them to make these two fun works of art (see below also) and they were such a hit! What a great way to review the warm colors, pattern and line.
So much sweetness!
Chris Uphues Hearts! If y'all don't know who Chris Uphues is, then you need to! He's one of my fave dudes to follow on Instagram. His artwork is so fun, so happy and so kid-friendly. They had a blast creating these happy hearts inspired by him.
J Goldcrown Hearts! If you need a quick one day project, I would recommend this one for sure! You can introduce your students to another street artist, J Goldcrown, and have them work in chalk! This is a great project for just about all levels.
Sculpture Hearts! Last year, I introduced my second graders to Celluclay with this project. I have 30 minute art classes with these kiddos so we had to hustle! We spent one day covering our foil hear in clay, two days painting and the last day stringing beads. These were one of my favorite projects for Valentine's day!
My Heart Has Wings! If you want to do a feel-good project with your faculty and staff, might I recommend this one? We did it on a PD day and it was so much fun. Of course, this would be a great project for kids as well.
Candy Heart Sculptures! My fourth graders created these candy hearts last year and they had a blast. We used plaster strips which created a super hard surface for the candy. We even made giant candy boxes to display them in!
Woven Hearts! Every year, first grade does a paper weaving and every year we do something a little new. Last year, they nailed the weaving part so well, I thought I'd introduce them to simple sewing. They did great and I loved hanging them up like a quilt.
Candy Heart Drawings! When my fourth grade early finishers were done with their candy heart sculptures, I had them move on to a drawing of their candy hearts with oil pastel.
Britto Mural! A few years ago, I had to be out for a couple of weeks for jury duty. While I was gone, I had my students work on the parts of this Britto-inspired mural. It was great because then there was a fun masterpiece to hang in the hall when I returned. You can check out the instructional videos in the link.
Valentine Animals! My kindergarten kiddos created these fun animals last year. I created an instructional video for each one which you can find by clicking on the link.
Collaborative Heart Mural! Collaborative pieces are a lot of fun this time of year. If you follow the link, you'll see which grades created what for this huge collaborative pieces that still hangs in our front office.
Peter Anton Box of Chocolates! This might have been a kid-favorite as it involved using EVERYONE'S favorite art supply: puffy paint! Check out how we made the faux candies and boxes by following the link. What are your favorite projects this time of year? Love to hear!
Well, we're back at it! Winter break is now a fond memory and I'm trying my hardest to wake up my art teacherin' brain. If you follow me here, then you might have seen some of the art supply-themed sculpture projects my kiddos are creating. Here's a peak in case you've missed:
We've been chatting about the artist Lucy Sparrow and her hand stitched convenience store (take a look, amazing!). With her in mind, we are creating our own art supply store with each class creating a sculpture of an art supply! Fourth graders created these glue bottles in ONE CLASS which blew my mind. They rocked it out. Here's how they are made:
So simple!
Second and third grade are creating these crayons. We did these a couple of years ago...but I'm doing the lesson a little differently this year. I'll be sharing the details in a blog post super soon.
Second grade is also in charge of the collage department. They created these glue sticks and scissors (below) and are now coming up with names for their glue and scissors.
They'll be attaching those large price tag thingies you can find at the office store. Here are the sketches of their ideas:
My second graders are the funniest kids ever, by the way.
My fourth graders were creating these pencils and my first graders saw them and FLIPPED OUT. "When are we making THOOOOOOSE?!" So...I had the firsties make some too. And guess what? They look just as good as the fourth graders! They are so proud of them. Here's the lesson.
But now....back to the glue bottles.
Here are the supplies we used: * Packing pockets. I'm not real sure what they are called...but if you send out a school-wide email, you'll get some. I now have a huge stash! * Rigid Wrap. Full disclosure: I work with Activa Products to create lessons. That being said, I LOVE their Rigid Wrap mostly because I am not a fan of papier mache. This stuff works so much better, dries super fast and doesn't require as many layers to create a hard surface. It's my jam. * Model Magic. Y'all know I'm not a huge fan of Crayola's Model Magic...but for this project, it worked perfectly! And you'll only need a pinch to get the job done. * White yarn. For the spilled glue. * Glue! Yep, you'll need glue to make the spilled glue. I know, sounds crazy. Just hang with me.
Now, one tip I fail to mention in the video is this: the Model Magic, as it dries, does this drooping thing. Meaning that orange tip might start to slowly change it's shape. Knowing that, I had my kids grab a paper towel, squish it flat and place it underneath the tip of the glue bottle as it dried.
The kids loved getting super messy. They even finished in enough time that they could have used clay to add coils of words but...maybe next time.
I do want them to add a label. My second graders have had so much fun dreaming up the names of their art supplies I have a feeling that fourth grade will too.
I'll be sure to keep y'all posted on the progress of our art supply sculptures.
Until then, close those glue bottles and stop spilling glue all over the place, ya filthy animals!
This summer, I had a wonderful chance to meet and hang out with the artist Becca Jane Koehler. I initially met her at our local HUGE craft show where she was a standout (and recognized) for unique pieces. I chatted with her a bit at the show and managed to grab a card...I knew she would be a wonderful artist to share with my students. On my YouTube channel, I have a playlist titled Field Trip! which is where I seek out and interview artists who share their process with me. I've filmed folk artists, painters, ceramicists, printmakers and now, Becca Jane! Here's the video:
I share these videos with my students either as inspiration for an upcoming project...or simply for them to get a peak behind the art makin' curtain. You are more than welcome to use them in your art teacherin' world!
You can see more of Becca Jane's work on her website. Personally, I love following her on IG because she's got a style that I really love. I also think my students will love her work and her process as well.
Before meeting her, I had no idea that many of her pieces were made with slabs of clay. I can totally see using this method with my students. I'm excited about the idea of creating my own plaster molds to use in the art room. Have y'all ever done that? I'd love to hear details!
In the video, I mention the co-op where Becca Jane creates. It's the Clay Lady Campus and it's simply AMAZING. If you are in Nashville and never been, you gotta go. And if you are ever passing through the area, be sure and drop by, it's worth the trip. The Campus has an art gallery where the artists who create in the space sell their wares. The prices are very reasonable and I always find myself walking out with a bag of ceramic treasures.
While you are there, an artist will pop up and volunteer to give you a tour of the campus. Be sure to take them up on the offer! Becca Jane gave me a tour after our filming and I met so many amazing artists...and got a chance to see their creative space.
Danielle McDaniel, aka The Clay Lady, is super awesome. I met her years ago and she seriously taught me everything I know about kiln fire clay. Be sure and check her out, even if you are not local...her books and resources are priceless!
I am loving the sgraffito method that Becca Jane uses. I did this method with my students years ago...and now I'm inspired to bring it back.
Isn't it amazing, watching an artist create? It always looks so easy. Even as a person who creates, I'm always enthralled when I watch others paint, draw, thrown on the wheel. Mostly because I know it's not easy and hasn't come without a lot of work and patience.
Loving that green!
Big thanks to Becca Jane for sharing the magic of her creative process with us!
Happy New Year's Eve! If you are a TOTAL homebody/crafty nerd like me, than that means your evening is much like mine: you are in your pj's, enjoying a cup of hot cocoa (of whatever else pleases ya, I'm not here to judge) and you are writing up your New Years Craft-solutions, er Craft-utions (that's my best effort to combine craft and resolutions, in case you didn't catch my drift). One thing that WON'T be on my list for 2018 is a Painted Globe...as I just narrowly completed it today!
If you follow me on IG, then you've been hangin' with me on this journey to turn this trashed globe into treasure. I found it in the trash at school and had to dig it out immediately. It wasn't until I had it back in my art room and added to my collection of globes (why I have so many, I have no idea...it's just that I cannot seem to let them be thrown away!) that I noticed why it had been trashed: it was busted right across the equator.
I took it home and decided to fix it with a large plaster gauze strip...which made it quite unsightly. During my repair stage, I noticed that this globe was pretty dated...and poorly made from plastic. With that in mind, I didn't have much of a problem giving this blog the reboot. I'm a lover of all things vintage and it burns my eyeballs when I see folks "flipping" vintage (i.e. turning treasure into trash, says me). However, this bad boy wasn't very old...just old enough to have countries with incorrect names and a big honkin' crack right through the middle.
Here you can see my plaster strip repair job. I done tole you it wasn't pretty.
If you've been on pinterest for a hot minute than you know that painted globes are pretty hip. Maybe even past tense hip. But I don't care. After a little bit of searching for ideas, I was so inspired, I decided to paint my globe. I used the same wall paint as I had for the walls at school because 1. I still have a ton; 2. I wanted it to match, color-wise; 3. It was more opaque than any other paint I could find.
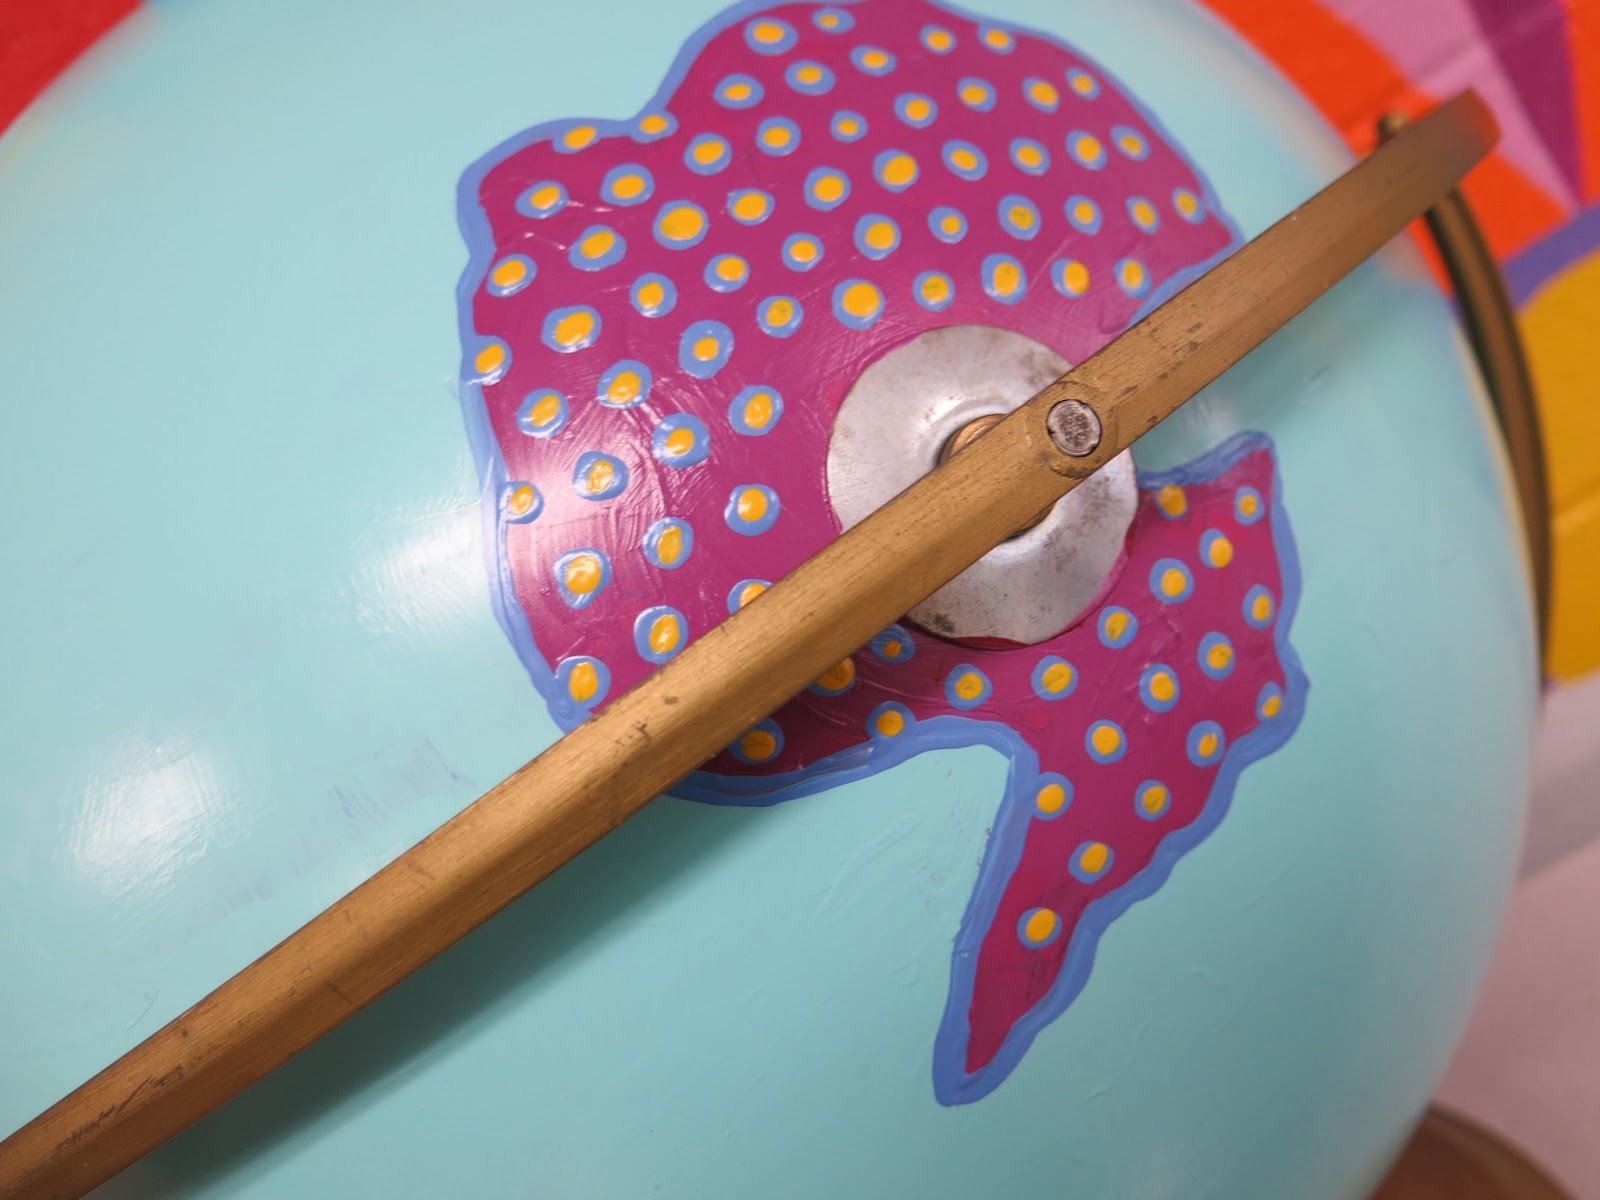
I decided to paint each of the seven continents and give each a pattern.
I used the planters I painted a while back as my inspiration. I just picked patterns at random.
I love patterns. Like, LOVE-love. Tis the reason you'll rarely find me in a solid color. And if you do, it's paired with a buncha other solid colors thus creating...A PATTERN.
This was such a fun winter break project for me. I've managed to knock out a couple...but sitting in my craft room and painting is my favorite way to end my day. I've got mountains of pattern-y painting projects just waiting for me in that messy space.
Texture is also my BFF. I suppose I could have used paint pens to create the patterns on this globe...but I don't know that they would have given me all this thick-ish texture.
You can kind of see my layers of paint in the photo below.
Now I do have a "normal" globe in my art room as well...for when we need to examine places other than just continents. But I think this will be a fun addition.
Brrr! My heat cut off when I was working a little in my art room today and it felt like Antartica! Or at least that's what 62 degrees feels like to me.
What projects were you working on this winter break?
Thanks for letting me share mine!
We head back this Wednesday for a coupla days of PD and the kids return on Friday. I'm excited to see their happy little faces! Happy New Year, y'all!