In the Art Room: Patterned Landscapes with Houses!
So, I totally thought I shared this video lesson with y'all in a previous post but after some digging, I couldn't find it on my blog! So sorry! I oftentimes post a video to my YouTube channel without adding it here simply because I'm crazy and forgetful. However, if you subscribe, you can stay up to date on my instructional videos (along with some other stuff) that you are more than welcome to use in your art teacherin' world.
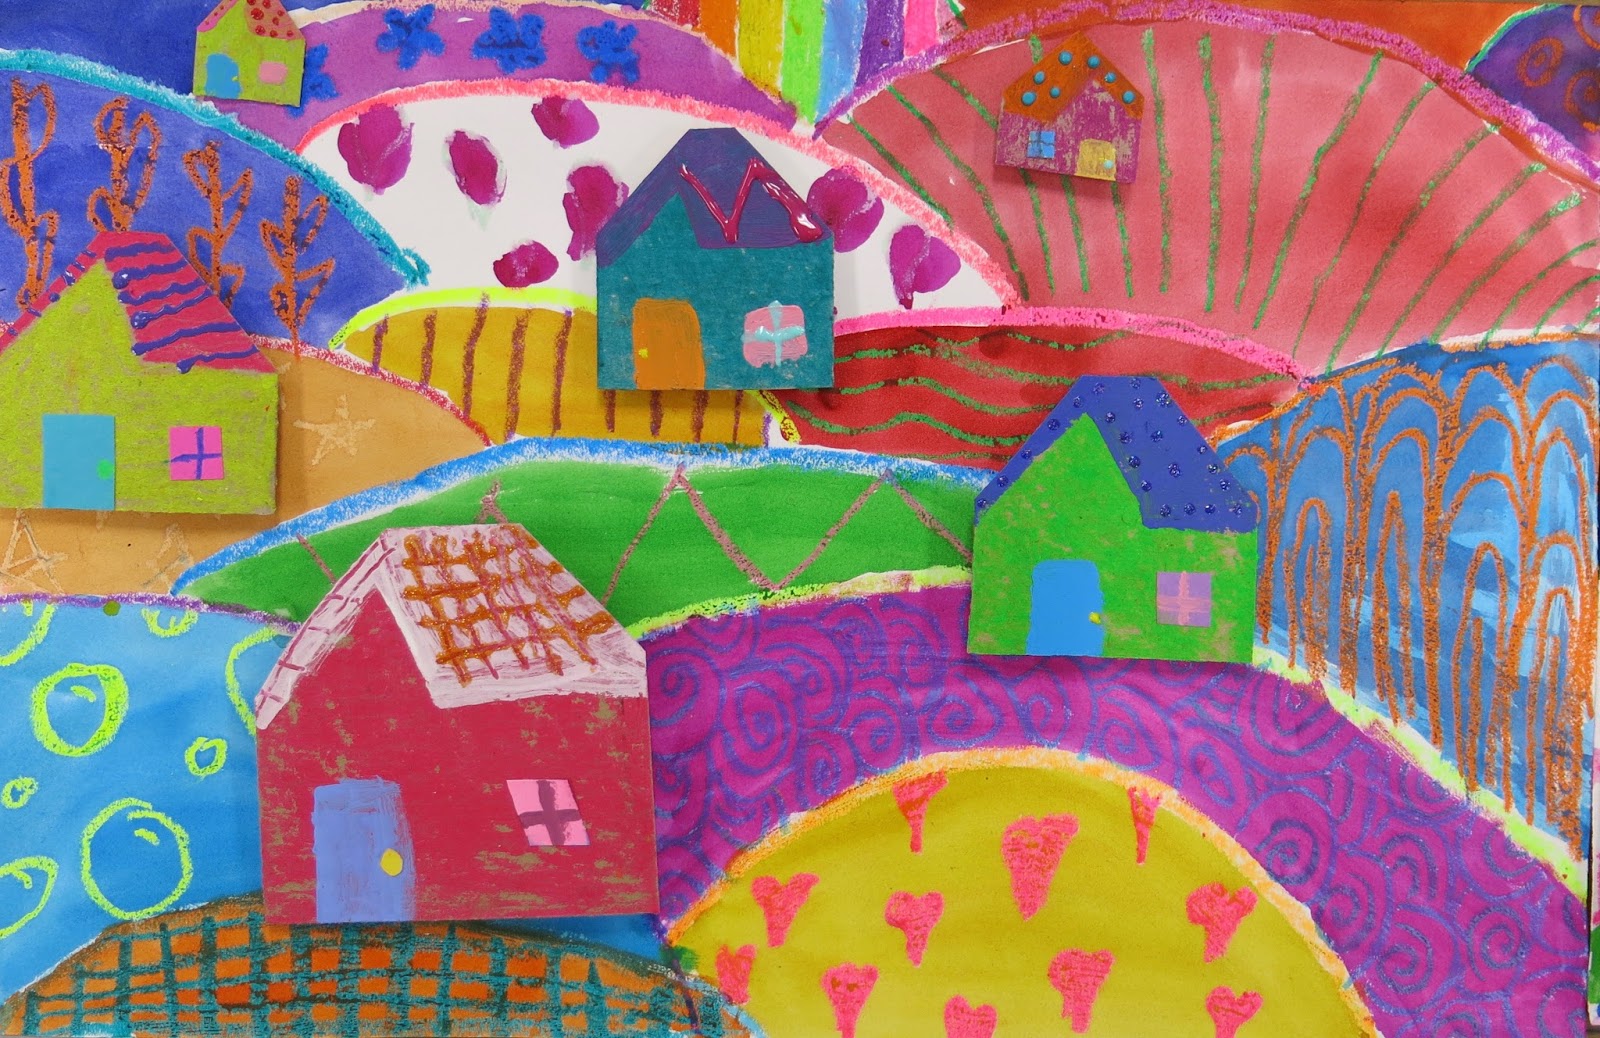
But first, let's talk about these amazing third grade patterned landscapes!
Forgive me but this blog post is gonna be photo heavy...I'm just in love with this project! Every single one turned out so happy, colorful and bright. Here's the video used to teach this lesson:
This did take us about three and a half art classes. While working on this project, my early finishers worked on this lesson which was a great tie-in what with the pattern review:
My students are now obsessed with drawing three dimensional houses!
I'm going to tell you exactly what art supplies we used for this project because, let's be honest, one of the reasons these look so good is because they are so bright and colorful. Kid artists deserve to use quality art supplies just like grown folk. That's easy to say...but not always easy to afford. The supplies I'm about to share are not bananas expensive...but they aren't your bargain basements fare either.
To start, my students used fluorescent oil pastels by Sargent. These are my favorite to use when we are creating a watercolor resist because of how bold and bright they shine through the paint.
They run about $7 a pop...and I purchase enough for two kids to share. You can find them in just about any art supply catalog. We don't use these all the time...like I said, we love them for resist. I've shared these many times before on my blog, I just love them!
I love both liquid and watercolor paint. However, I wanted the kids to use pan watercolor paint for this project because I'm still learning the liquid watercolor paint ropes. How much water do I add to dilute? It looks black in the cup and that confuses the kids...you get the idea. I'm working on my issues with liquid. When it comes to pan watercolor tho, not all are created equal. I LOVE Crayola's Mixing Colors:
Okay...here's the deal. I didn't always love Crayola's watercolor paint until I discovered theses guys. Here's the deal: DO NOT BUY THIS SET unless you don't have any watercolor trays. Instead, by the refill colors in the set. Here's what I have: I got rid of the black, white and brown from my watercolor trays. Now I have refill pans that I simply pop out and replace of the following Crayola watercolors: red, red-orange, orange, yellow, green, turquoise, blue, blue violet, purple and magenta. I place them in the paint pan in that order.
These photos have not been altered...that's truly how bright the watercolor and oil pastels are! Now you see why I love 'em so!
For our houses, we used cereal boxes. I sent out an email at the start of the year asking for cereal boxes simply because we need that cardboard for projects like this!
The kids used "naked" oil pastels to do a rubbing on the house before either collaging the doors and windows on or painting them. That was a hot mess of a day, not gonna lie. We had paint, cardboard, paper, glue and puffy paint all on the tables.
As far as puffy paint goes, I like Tulip brand that can be purchased in most craft stores. It's expensive at about $3 a bottle...but I LIVE for puffy paint and so do my kids!
Once the houses were dry and the background was complete, the assembly was ready to happen.
I am the proud owner of a TON of foam core from matting and framing artwork. I simply chopped that into bits for our pop out foam.
To really get those houses in the foreground to stand out, the kids made sure to double up the foam core. One piece was used for those in the middle ground and either one or none for the background.
With these complete, my students are moving on...we are now onto creating self portraits for our winter art show!
I decided to give myself a wee break and use a lesson from last year for our selfies...it was a huge hit so I'm excited to give it another go:
We'll be using my favorite chalk brand for this project: Faber-Castell!
Alright, I did say this post was going to be photo-heavy, right?
But, can you blame me?! Each one is just so happy!
I definitely will be doing this project again. I can't think of anything I'd change about it.
Even when some friends went wild with the puffy paint, it worked!
You'll have to keep me posted if you give this project a try in your art room. Please be sure and tag me. Not only would I love to see but it also helps others find the details on the lesson.
Just a peak at the foam core. I stressed that none should be visible from the front of the house.
Thanks for the tips about supplies! I started at my school last year so I am building up my supplies. I have all prang water colors. Are Crayola significantly different? I am going to get liquid to try for next year, too!


Do you have any trouble with puffy paint getting on kids clothes?
ReplyDeleteHow do you store houses with wet puffy paint??
This would make a cute quilt!
ReplyDeleteYou amaze me and I SOOOO appreciate the time and energy you give to others! Thank you. Wishing you a wonderful weekend.
ReplyDeleteAmy
Thanks for the tips about supplies! I started at my school last year so I am building up my supplies. I have all prang water colors. Are Crayola significantly different? I am going to get liquid to try for next year, too!
ReplyDelete