Wednesday, March 6, 2013

DIY // In the Art Room: Making Mary Poppins

Mary Poppins Outfit details: bag, skirt and ruffly blouse: vintage, thrifted; sweater and boots: Buffalo Exchange; gloves and hat: vintage, gift from a friend; umbrella and red necktie: made by me
Why, hello thar! 'Tis I, wannabe Mary Poppins, practically (im)perfect in every way! Like many schools, mine celebrated Read Across America week with a "dress like a storybook character" day. Because we are currently learning about all things United Kingdom and I'm reading Mary Poppins to my second and fourth graders, deciding who I would dress like was as easy as taking my meds with a spoonful of sugar. Even if I did wanna dress as Sherlock Holmes for a could coupla days. But I didn't think my pipe-puffing would go over well with those party-poopin' principals in my building. So Mary 'twas!

Whilst dressed as Mary, I tried my very best to keep my faux-British accent going as long as I could. We do this little routine in my room where the kids repeat the art directions after me. For kicks we tried out our best Brit accents and the kids loved it. I'm sure that if any actual British folk heard our southern accents attempting to copy theirs, they'd spit up their tea and biscuits.
 Fave Mary moment...and how I foresee my classroom evaluation going when my aforementioned non-pipe-smoking principal drops in to witness kids -n- clay:

Mr. Banks: Just a moment, Mary Poppins. What is the meaning of this outrage?
Mary Poppins: I beg your pardon?
Mr. Banks: Will you be good enough to explain all this?
Mary Poppins: First of all, I would like to make one thing quite clear.
Mr. Banks: Yes?
Mary Poppins: I never explain anything.
The thing my outfit was lacking was the famous parrot-headed brolly. You just can't be Mary Poppins without it. But where to find such a thing? I decided that I'd just have to make my own. I sent out an umbrella email request to the fabulous teachers at my school and within minutes I had my mitts on a lovely wooden handled umbrella.
As soon as I got home, I busted out the tin foil and started sculpting the parrots head. I was too impatient to mess with the masking tape portion of 'mache'ing so I hopped straight to the covering-in-sticky-newspaper part. I'd later come to regret this (like so many things in my life) as it prevented me from having a smooth surface for my bird.
After taking what seemed like days to dry, I painted him with acrylic paints and used an image from pinterest as my inspiration. Laziness prevented me from giving him a coat of Modge Podge. Someday, when my laziness takes a holiday, I'll get to that step.
Ack! Giant parrot eye! In some photos, the tip of the parrots beak is white so I painted mine as such. One of my principal ladies said it looked like his nose was chipped. Some people just don't know.

More from the best movie on the planet...Parrot Umbrella: Awk, that's gratitude for you. Didn't even say goodbye? Mary Poppins: No, they didn't. Parrot Umbrella: Look at them! You know, they think more of their father than they do of you! Mary Poppins: That's as it should be. Parrot Umbrella: Well, don't you care? Mary Poppins: Practically perfect people never permit sentiment to muddle their thinking. Parrot Umbrella: Is that so? Well, I'll tell you one thing, Mary Poppins: you don't fool me a bit! Mary Poppins: Oh, really? Parrot Umbrella: Yes, really. I know exactly how you feel about these children, and if you think I'm going to keep my mouth shut any longer, I'll...
[
she clamps his mouth shut] Mary Poppins: That will be quite enough of that, thank you.

Time for tea! Anyone for a cuppa?

All week, leading up to the arrival of Mary Poppins, my classes enjoyed a spot of tea and biscuits. I brought in some of my vintage table clothes and fancified one small area of my otherwise disastrous art room. I brewed each class a pot of tea (apple, peach and mint) and picked up some shortbread cookies and tea biscuits from the store. One kind UK blogger (thanks, Jerra!) informed me that I needed to serve my tea with "lumps" (sugar cubes) and I'd have to say, the kids liked that the best.
Pinkies out, dearies!
Of course, I just had to bring in my small collections of Mary Poppins records. Thankfully our librarian still had one of these ancient bad boys on hand.
Most of my students had never seen a record player before (shoot, they find the tape player on my CD player fascinating) and I found several of them with their noses right up to the spinning record like this young dude.
In my crazy closet, I had almost the perfect coat and scarf to complete my Poppins look. I thrifted the brown coat a while ago and the scarf is an old number from the Gap.

And, would you believe, the most magical thing happened! This weekend, hubs and I took a short trip to Walt Disney World and Epcot in Orlando. On our final day there, while walking through the Great Britain portion of Epcot, I ran into none other than Mary Poppins herself. Here she is asking me if I keep my students in "spit spot shape". Please don't ask me what's going on with my hair.

An even rarer occurrence: Me, in jeans!

From Mary and I, we wish you a supercalifragilisticexpialidocious week. So put that in your pipe and smoke it, Sherlock!


Monday, March 4, 2013

What the Art Teacher Wore #57

Crazy Hat Day: Where it just wouldn't be the same unless you had a Crazy Outfit to match. Go outlandish and tacky or go home, says me. hat and skirt: a DIY that I know you are dying to try, here; shoes: yet another Sunday afternoon project for you; blouse: gift from a friend; belt: Anthro; tights: Target
Greetings, kids! I come to you fresh outta Read Across America Week. The teachers and parents at my school put together all sorts of fun reading goodness including a book fair, a reading night and, my personal fave, thematic dress days. You can catch what I wore for last year's RAAW here, if you want a good laugh and sigh of relief that you don't have to appear in public looking as ridiculous.

And speaking of reading, I thought I'd share with you just a few of my fave reads this week as well. See how thematic I am? It's almost like I should be a teacher or something. Got a favorite book of your own? I'd love any recommendations of good reads. Muchas gracias and enjoy your week!
Are you familiar with this Canadian author? Apparently Robert Munsch started his career by just doing some improv story telling at his local library. His tales were so silly and strange that his young listeners soon were soon hooked. I am in love with all of his stories, but this tale of a young artist that colors herself "almost entirely all over" with "super indelible never-come-off markers" is a favorite with all of my students. I highly recommend it.
Show Your College Spirit Day: Why I'd love to as I do believe I went to the best college in all the land: Indiana University. I have so many wonderful memories of my 5-ish (ahem) years there that I try to make an annual reenactment with my buddies. And while I never acquired a t-shirt, I do have plenty of that Hoosier red and white in my wardrobe. sweater: vintage, thrifted; dress: from Germany; tights: Target; shoes: Fluevog
I have almost all of these Mike Venezia "Getting to the World's Greatest Artist" books because they are awesome. They are full of visuals with just the perfect amount of funny and factual. When reading them, I read the artist's first name (for example, "Claude") and have the students say the last name ("Monet"). By the end of the story, the kids know the artist's name as well as his/her life and work.
Words on a Shirt, er, Skirt Day: Since I wore my one and only shirt with words last year, I opted for words on a skirt this year. Although I did have to use the force all day long: (student) "Hey! You don't have words on a shirt!," (me) "That's right. Because it's actually words on a skirt day. Now move along, move along. This isn't the art teacher you're looking for." dress: created for last year's trip to Star Wars Weekends, diy here; tights: Target; boots: Anthro; blouse: thrifted
Did anyone else grow up loving Shel Silverstein's work? I have the world's worst memory but I can vividly recall my second grade teacher animatedly reading her copy of Where the Sidewalk Ends. It was one of my favorite things. As a kid, I was inspired to write poems and short stories thanks to Shel Silverstein.
Awesome.
Show Your School Spirit Day: Also known as Where This to Starbucks and Receive Bizarre Looks Day. When I told the hipster teen workin' on my soy-tea-latte that I was a teacher, he just looked at me with a "duh-lady" expression and said, "yeah, I thought so." t-shirt: designed by one of our fourth graders, tie-dyed and bow-dazzled by me; tiger tights: amazon. Yes, seriously; skirt: J.Crew, gift; shoes: Clarks
Another fave when I was growing up. I do believe I've read this book more than a dozen times. The illustrations are the best. Harriet's penchant for those black and white composition books is why I carry one myself. What? If you've read the book, you'd understand.
Dress Like a Storybook Character Day: I'm most definitely not "practically perfect in every way" but I do love me some Mary Poppins. Especially since she ties in so well with our study of the United Kingdom. I actually began reading Mary Poppins to my second and fourth grade students a couple of weeks ago while they were weaving. Little did they know there was a reason behind my madness. I'll share with you more details of that and the making of this lil outfit later this week. Until then...ruffly shirt, bag and black skirt: vintage, thrifted; sweater and boots: Buffalo Exchange; hat and gloves: vintage, gift from a friend; parrot umbrella: DIY by me
This summer I met Richard Sherman who, along with his brother Robert, wrote all the songs in Disney's version of Mary Poppins. He told us how Walt Disney had a very hard time convincing  P.L. Travers to allow him to turn her book into a movie. We are actually at the magical world of Walt Disney World this weekend on a little pre-birthday trip/any-excuse-to-get-outta-town vacay. And while I haven't seen Mary (yet!) I did manage to score a Poppins Pin! I'll be sure to share our trip with you in a future post.


Wednesday, February 27, 2013

In the Art Room: Totally Tubular Castles

Unlike most students, this fourth grade dude opted for a moody evening sky. I love how well it works with this haunted looking castle.  
I recently discovered that if I need something, all I have to do is ask. For instance, I totally underestimated how much glue we would consume, er, use in the art room this year and only ordered one gallon. When that well ran dry, I simply sent out a school-wide email and within hours I had enough glue to put back together all of the dishes I've managed to break over the years. Thank goodness! My dishwasher is simply devouring those styrofoam plates!

  This is also how I managed to acquire the four million toilet paper tubes we used for this castle building project. The only slight draw back to asking for stuff: you just might receive far more than imagined (shoot me an email if you'd like to become the proud new owner of six garbage bags of toilet paper tubes! They make great gifts -- the expression on the recipent's face is always one of pure confusion which I like to interpret as joy).


Because our castle was apart of our study of Germany, I also incorporated some of Grimm's Fairy Tales into the mix. This young artist dude obviously was inspired by Rapunzel.
Okay, I'm dying to ask the artist about the story behind this drawing. Just why is the knight in shining armor high tailin' it out of town? Did he find out just how high maintenance those Rapunzels can be? "Climb up my hair, now braid my hair, make that a french braid, ouch, stop pulling, that hurts! Climb down my hair and get outta here you big ape!"
This artist had his work on display at our local art museum, The Frist Center for Visual Arts. Pretty sweet. My mom once taped my drawing to the fridge. Okay, I taped it to her fridge.


Just exactly how where these amazing castle pieces created by fourth graders, aside from a gallon of glue and a ton of tubes? Well, lemme tell you:
  1. Like I said, this project was a study of castles in Germany. We focused on Schloss Neuschwanstein (where you can see a super brief history here) and the landscape of Bavaria. During our first couple of art classes, we talked color theory and sky painting. 
2.  Next up: Cloud painting. We use a bristle brush to create the cloud texture with an emphasis that clouds have a flat bottom (hey, just like the art teacher!) and a fluffy top (ha! art teacher wishes). I also chat about showing space by painting the clouds near the horizon smaller and have them increase in size as they climb up the page.
3. After a big fat hairy chat about the landscape of southwestern Germany, we tackle the land. The students were given three pieces of 18" X 6" paper in the following colors: white, light green and green. They were instructed to crumble each piece, smooth it out, and rub water based oil pastels over each. Then each piece of paper was given a stroke of water with a paint brush to help blend the oil pastels. I have found the Crayola Portfolio Oil Pastels work best for this.

4. Once those were dry, each of the three papers were torn lengthwise. Some students opted to create three-dimensional mountains. This was done by taking a small torn piece of paper, coloring it heavily in oil pastels, laying it on the mountain and smearing the oil pastel from the paper to the mountain. From there, the land was glued to the sky painting.


5.  After all of that landscaping, we were finally ready for our castle building. I kept the directions very basic because I was curious to see what the students would come up with. What I did tell them was to cut a slit up the back of the tube and fold each cut line about 1/4". This would be where the glue would go to attach to the landscape. This is also how the gnomes were glued down in my project posted last week.

6.  For the top of the castle, short cuts were made and every other one was folded down. Easy.

7.  The kids came up with the idea of the draw bridge. When one got the idea to glue a "chain" to hold the bridge, the rest just had to do the same.
In case you mustache, this is Mustache Kingdom.
8.  Here's how they were shaping up after a couple of days. Once glued down, they were ready to be painted.
 9.  Students were to paint a base coat onto their castles. I offered them black paint but a handful wanted something a little more colorful. And sparkly. What's a castle without glitter, after all?
 10.  After the base coat was applied, students sponge painted gray paint onto their castle for a rock like texture. When one student used the back of his paint brush to create bricks, the rest of us all had a "why didn't I think of that?!" moment.
Yes, that's a flying PopTart/Taco/cat-with-a-rainbow-shooting-out-it's-butt thing. Not sure if that's from some cartoon or imagined. Most likely the effects of glue consumption.
 11.  Once castles were complete, the real fun began. Our castle either had to have a flag and/or a shield. After a chat about Grimm's Fairy Tales, I encouraged the addition of characters to the scene. Those that decided to not include characters and finished early wrote stories about their kingdom.
I'm kinda on this kick where I add that super fine glitter to all of the paint. You can see that shine in this pair of castles.
These kids have the funniest imaginations. I love their silliness.
Last photo, I swear! This little amazing artist had the genius idea to add puffy paint vines to her castle. I'm rather smitten with her dragons.
And there you have it! Many moons, tubes and a gallon o' glue later, you've got some of the coolest castles in all of Tennessee. Now, that I've got all the glue a girl could ever want, I'm thinking of sending out an email asking for coins. Tell me what you think of this:

"Dear Teachers, The students will be using loose change. Would you mind sending any and all pennies, nickels, dimes and quarters to the art room? Thank you!" 

With all these generous teachers of mine, this outta easily cover my Spring Break vacay to Daytona Beach. Art Teachers Gone Wild, here I come!


Monday, February 25, 2013

DIY: Ceramic Gnome Homes

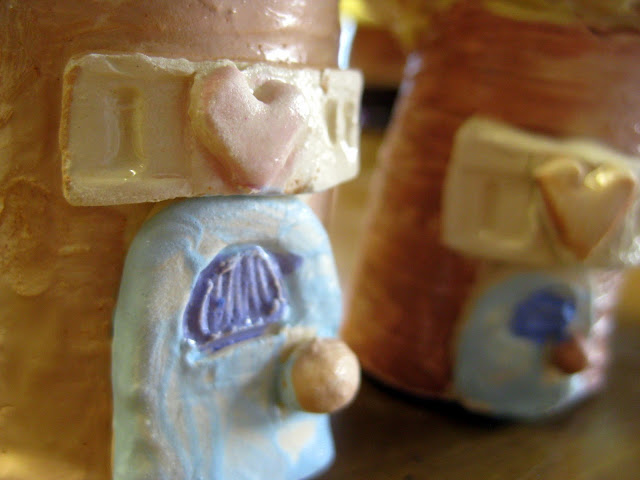
A neighborhood of gnome homes.
 My hubs and I've been married for something like a dozen years. Not sure exactly because I lost our marriage certificate long ago. It wasn't a day that stands out in my mind because it was simply a fifteen minute session with the judge at the courthouse. I don't remember much except that I wore this horrible cornflower blue two-piece suit dress from Talbots thus making me look like Barbara Bush. Hawt.

Details of adorableness. You sure you can handle this much cute?

Wait. Where was I going with this? Ah, yes, married life. In the beginning, hubs and I were never apart. And it was lovely cause we didn't wanna be. This changed over time (like six months in) and I began to kinda-sorta freakin' love my alone time. You see, hubs has to go on these occasional work trips and when he does, I likes to party. And by party I mean invite a buncha buddies over for grown-up drinks, laughs and gnome-home making. Exactly what the Beastie Boys were talkin' about during their fight for the right to party.
Textures for clay: lace, crochet bits, burlap and plastic doilies. Although texture possibilities are endless. My personal fave: the bottom of my shoe.
 Let's say you wanna indulge in your own gnome home making merriment. Well, this here clay project is so easy you can still be successful after a grown-up drink or three. Here's what you'll need:
  •  clay (I use a low-fire clay like cone 04-06)
  • rolling pins
  • textures
  • cornstarch (clay can often be too damp and stick to your rolling pin and textures. Cornstarch makes it less sticky without removing too much moisture)
  • old toothbrushes and cups of water
  • wooden skewers (for cutting the clay)
I swear to you my hands are not this skin-removed pink. Although maybe they are. The kids can hardly focus when I demonstrate on the elmo (not the doll, you silly, the piece of electronic equipment). My favorite kid comment of late: (whispering) ewww, did you see her hands?!
 To begin, I create the bottom of my home. Pick a texture and place it on a non-sticky surface. Place your clay on top of that. If your clay is sticky, sprinkle it with cornstarch and set to rollin' wit your pin. Not your homies. Keep you clay at a 1/4" thickness. Any thicker can cause explosions in your kiln while any thinner can be too weak. You gots to get this just right, Goldie Locks.
 Peel your clay off and viola! You've got texture. Now let's roll it up and make it into the base of your home.

 Now you could just roll it up as-is as shown on the left. Or you could cut one end of your rolled slab with an interesting line to jazz of the piece. It's up to you. Whatever you decide, use your old toothbrush to scrub one side thus gluing the connected pieces together.
 For some variety, I opted for a different texture for the roof. Crocheted bits like this can be purchased at your local craft store or pinched from your grannies house. You know, that lady who dresses like Barbara Bush.
 Roll this up waffle cone style. Again, toothbrush before you attach one side of the cone to the other. It might stick while you work but there's a chance that without using the toothbrush and water to attach it might not remain stuck for long.

 Set the roof on your house and pray you made it the right size. And if you didn't then you just messed the whole thing up. Aw, just kidding. But you did kinda mess up. Sorry. Make your waffle smaller/bigger and try to get it right this time, would ya?

My other favorite textures? Stamps! The larger stamps could also be used for the base or the roof.
I decided to use the stamps for details like this little faux wooden door. Clay loves to adhere to stamps so go all cornstarch on it and you'll be fine.
 My fave finishing touches are doors, windows, flowers and hearts. There are endless possibilities. I mean, just take a look at this cuteness:

 Aww! Add a couple hearts to the top for you and that special guy you hope goes out of town. These were done with stamps but you could also use alphabet pasta. Just leave the pasta in and let it fire off in the kiln.
 Sweet little ladder. It's always good to have a fire escape.
 It's so adorable it's burning my eyes. Seriously.
Because I knew I'd have a hard time getting all these ladies back at the same time, I opted to have them make and glaze their houses in one sitting. For that I used The Clay Lady's Clay Paint. Her "paint" is an engobe (which is dried clay with pigment added). This can be painted directly on to wet clay. Once dry, these pieces were dunked in The Clay Lady Glaze. Because I love vibrant colors, I use Mayco's Stroke and Coat with the children.
I'm thinking that the creation of these homes just might have gotten the gnome bug outta my system (as evidenced by this gnome dress, my students gnomies and my own gnome homes). In fact, I think I'll turn to my longtime fashion consultant and ask her opinion. What say you, Barb?
Hey! That's my wedding dress!
Geez, so many caption options with this photo:

"Shhh! You'll wake the gnomes!"

"Smell my finger. Does it smell like Cheetos to you?"

"I know where your marriage certificate is but I'll never tell!"

Wow, Barb. Just, wow.

Merry gnome-home making to you! Until next time, enjoy your week.